

Have you ever stepped back from your freshly painted wall and noticed streaks, drips, or roller lines? Nothing is more frustrating than working hard on a painting project only to have the final results be less than what you were hoping for! If you’ve noticed imperfections like the ones described above on your walls, we’ve got some tips to help improve your paint rolling skills.
You’ve probably heard it before, but we can’t emphasize enough how important it is to use good-quality tools. For rolling on paint you’ll need:
- 5-gallon bucket and bucket screen or a painting tray
- Paint Roller Frame
- Roller Cover
- Extender Handle
Pass up on the bargain paint roller kit at your local hardware store that may seem like a good deal. You’re better off spending a little more on a higher quality roller frame and cover. Purchase a shed-resistant roller cover with a shorter nap (¼” to 5/16”) to achieve a smooth finish on drywall. You will want to check that your roller cover has a plastic core, not cardboard one that will absorb paint and break down after a use or two.
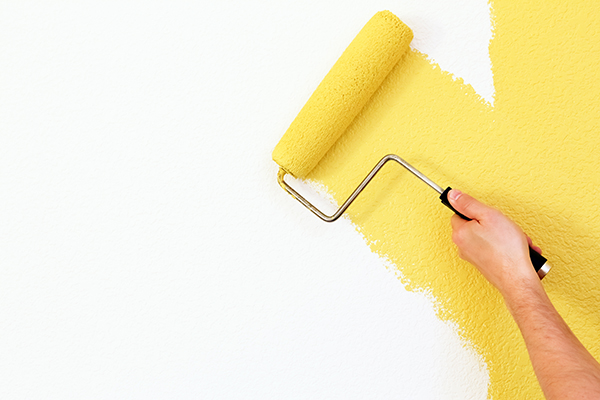
Using a Roller to Paint
- Remove any loose fibers from your new roller cover; dabbing painters tape against the roller cover is an easy way to work any extra fibers free.
- Roll your cover into the paint in your bucket or tray multiple times until the roller cover is completely coated. A properly loaded paint roller should have an even coverage of paint. It should not drip when moved or require much pressure to transfer paint onto the wall.
- Working in a ‘W’ pattern and starting at the top of your wall, roll paint onto your wall in two to three foot length sections. Shift your pattern to fill in the unpainted areas, overlapping the edges of your previously painted section slightly. Always work from the top of your wall down to avoid accidentally bumping up against wet paint.
- Avoid applying pressure to the roller when painting. Pressing the roller firmly against the wall will lead to ridges along the edges of your roller lines. If you find yourself pressing harder to get paint on the wall, it is time to reload your roller.
- Repeat until your wall is covered.
As you are painting it is always a good idea to have a damp cloth on hand to quickly clean up any spills or splatters.
Hopefully, these tips help you get the smooth, streak-free finish with a roller that you’re looking for. Why not get a little practice in with one of these quick painting projects?
Working slowly, carefully, and avoiding putting too much pressure on the roller should have your walls looking fantastic, but if you run into any trouble and want to hand your project over to the professionals, we’re always here to help! Call our office today to get your next painting project scheduled.