
Simple things often give greater pleasure than things that look complicated or elaborate. In the case of interior painting, there is a remarkable pleasure found in crisp, straight lines! How do painting companies achieve that? Is it possible for homeowners to achieve that same effect? They key is using painter’s tape, and it is not quite as simple to use as it may look!

How to Put on Painter’s Tape for Interior Painting
Before you give in to that temptation to rush ahead with your paint, take the time to get some quality painter’s tape. Traditionally, most painter’s tapes have been blue, though the Frog Tape brand has some really excellent products which are yellow or green.
Prior to applying the tape to the walls, clean them well. If the walls are dirty, neither the paint nor the tape will adhere well, and you may end up with dust bunnies or bits of hair permanently painted on!
The actual method of applying the tape relies on a couple simple concepts:
- Use strips of tape about 2 to 4 feet long. Make each piece overlap the one before it.
- Begin in a corner and work your way across the wall. Use one hand to pull the tape tight and hold it straight, and the other hand carefully pushes the tape against the wall to make it stick.
- Take your time! Far to many paint jobs are ruined by impatience! The careful application of painter’s tape is the biggest key to those crisp lines you desire.
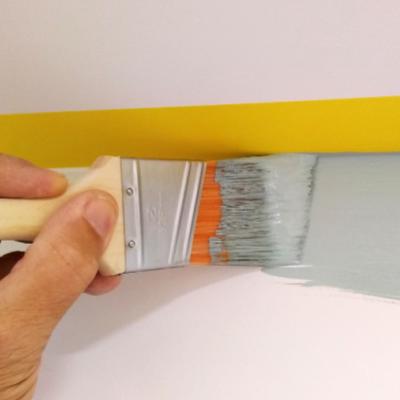
Interior Painting with Tape on the Wall
Think of your painter’s tape like a bumper. It offers protection from mishaps, but you still want to avoid hard contact as much as possible! If you rely to heavily on the tape, the results will disappoint you. Here are a few key tips:
- Use only a moderate amount of paint on the brush.
- Aim just to touch the edge of the tape with the wet brush. Don’t slop paint all over!
- Avoid having significant amounts of wet paint on the tape seam. Watch out for any puddling, running, or dripping, and brush it away. Any pooling paint is likely to seep behind the tape and ruin the look.
- Before you brush on the paint, run your finger along the tape once more to make sure the whole length of it adheres firmly to the wall.
Removing Painter’s Tape
There are two schools of thought when it comes to Band-aid removal. Some take the painful “bit by bit” approach. Others just tear it off all at once! Is there a preferred method with interior painting?
Best results come from taking the tape off early, while your fresh interior paint is still wet. That way, the paint on the tape has not bonded with the tape on the walls.
- Start pulling from one corner, and work your way along the wall.
- Pull so that the tape is coming off at a 90-degre angle from the wall.
- As you pull, roll the tape into a ball with the wet paint on the inside. Be careful not to let the tape contact any walls or floor where it would leave a mark.
If you are not able to remove the tape when the paint is wet, then wait until it has fully dried. This takes about a day. Next, use a razor knife to make a thin cut along the edge of the tape. This allows the tape to come away from the new paint freely, without peeling.
Cherry Hill Painting
While correct use of painter’s tape is a great way to get superb interior painting results, there is an easier way. Hiring a professional interior painting company ensures fantastic results, and saves you time and effort!
Cherry Hill Painting has served New Jersey and Philadelphia for two generations. We offer exceptional craftsmanship and attentive customer service. Best of all, we offer clean, straight, crisp lines, just the kind you love!
Call Cherry Hill Painting for a free estimate for your next interior painting project. We look forward to meeting you!